What is a Mass Ply Lam (MPL)?
Mass Ply Panels can take many forms depending on the end use and design. Specialty beams and columns benefit most from Freres Mass Ply Lam (MPL).
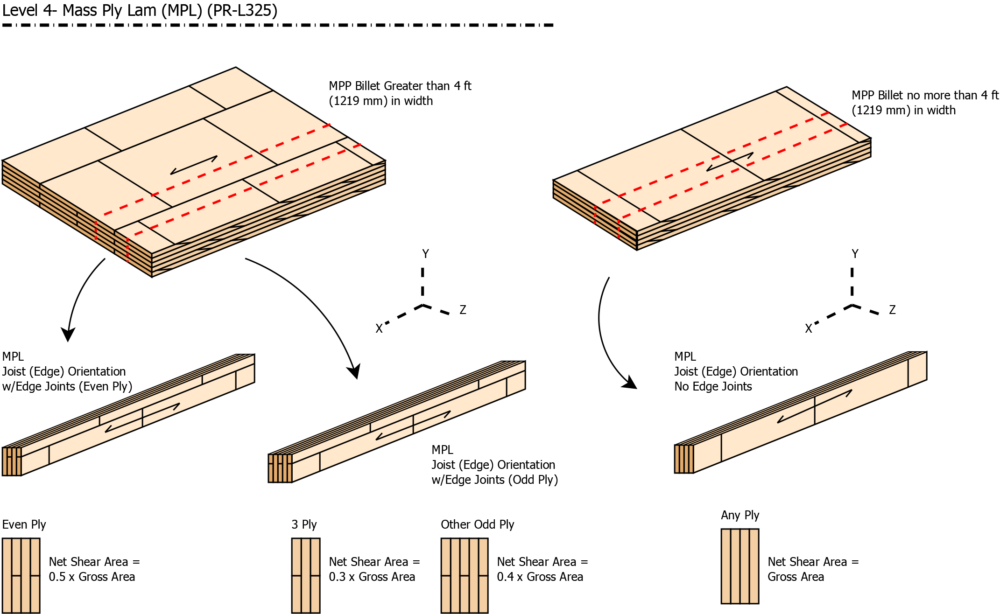
Figure 2: Differences between Mass Ply (left) and MPL (right)
MPLs are different from Mass Plys because there are no edge joints on MPLs. An edge joint is the gap between layers of an Mass Ply panel. (See Figure 2.) The lack of edge joints increases the strength of the panel. The benefit is especially visible when used on edge as a beam or column.
MPL panels can be thicker than a standard Mass Ply. MPL panels can be made as thick as 24 inches (610 mm). These massive panels can be used as columns to support the largest of mass timber buildings with ease. MPLs smaller than 12 inches (305 mm) are able to be cut on the Computer Numeric Control machine (CNC). MPLs larger than 12 inches (305 mm) must be cut on the beam and column line. The beam and column line is very fast and produces accurate cuts for many building elements.
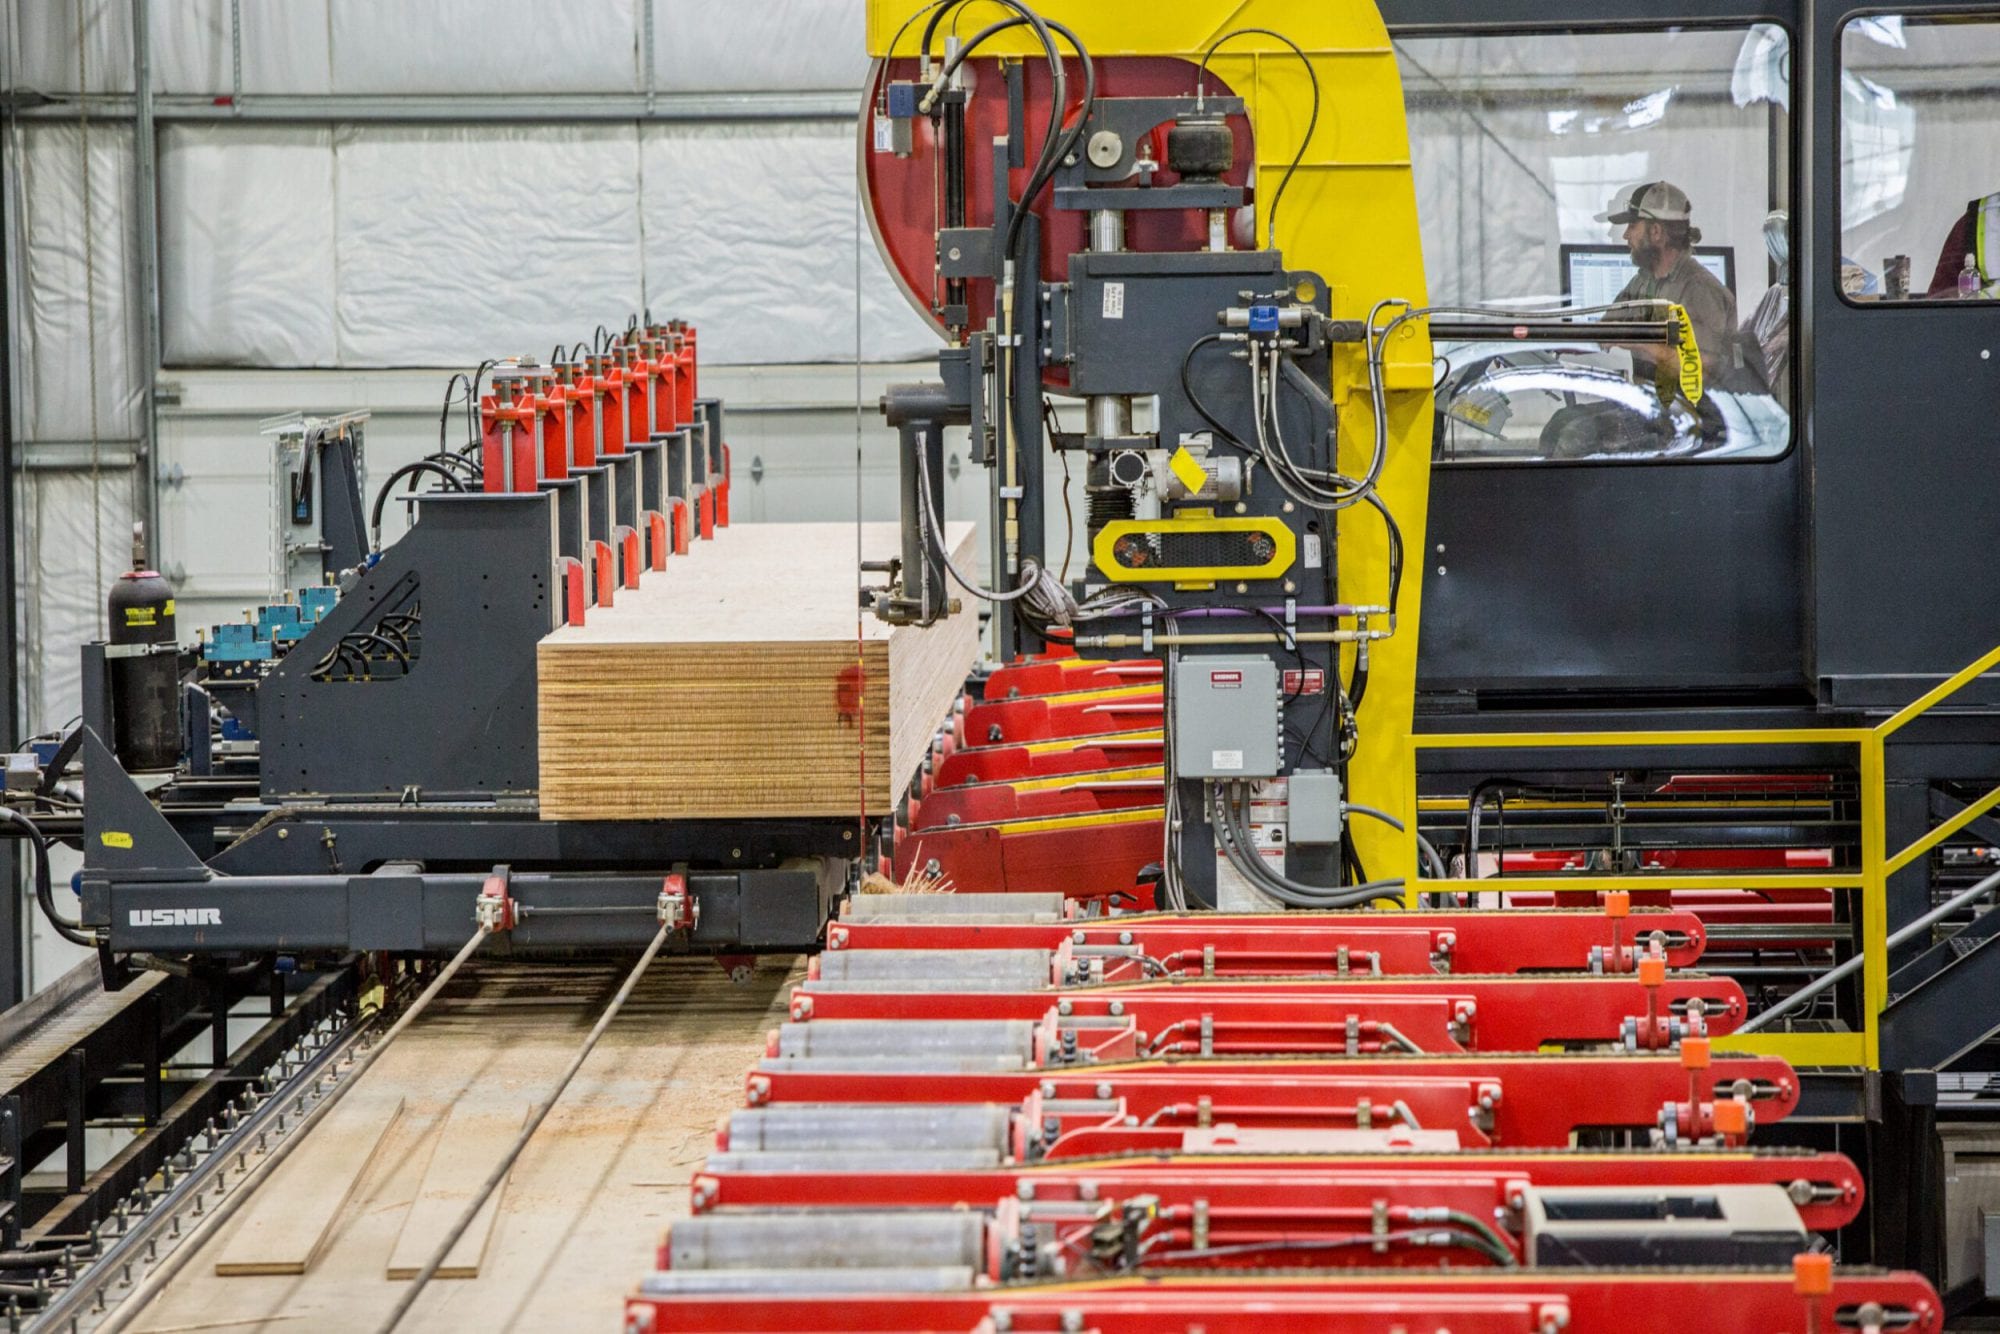
How are MPL Beams and Columns Cut?
The beam and column line uses a large band saw to cut the panels to width or “rip” the panels.
Each time the panel is cut, the blade is carving wood out of the way using the “teeth” of the blade. The width of the blade tooth is called the “kerf.” (See Figure 3.)
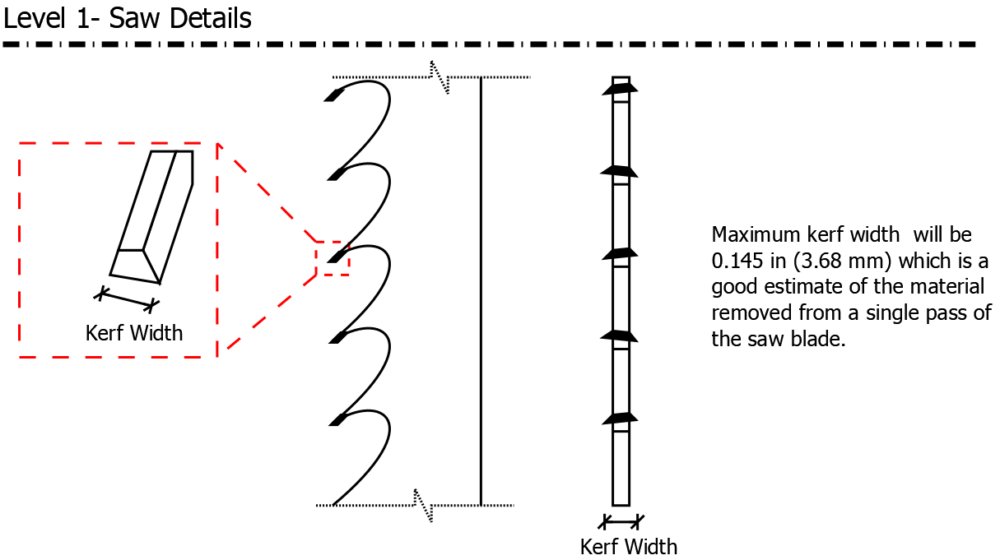
Figure 3: Band Saw Kerf for Beam and Column Line
The kerf width is what we use when considering the amount of wood lost to saw dust. The kerf will affect the number of beam and column elements that can fit into a single Mass Ply billet.
The layup process for Mass Ply also affects nesting. The machine that stacks Mass Ply layers for gluing is very flexible. Many different layups are possible which is great for customers. The added freedom for stacking also leaves some freedom for the panels during alignment before pressing. The small offset in layers can lead to a slightly uneven cutting surface for the raw billet. (See Figure 4.)
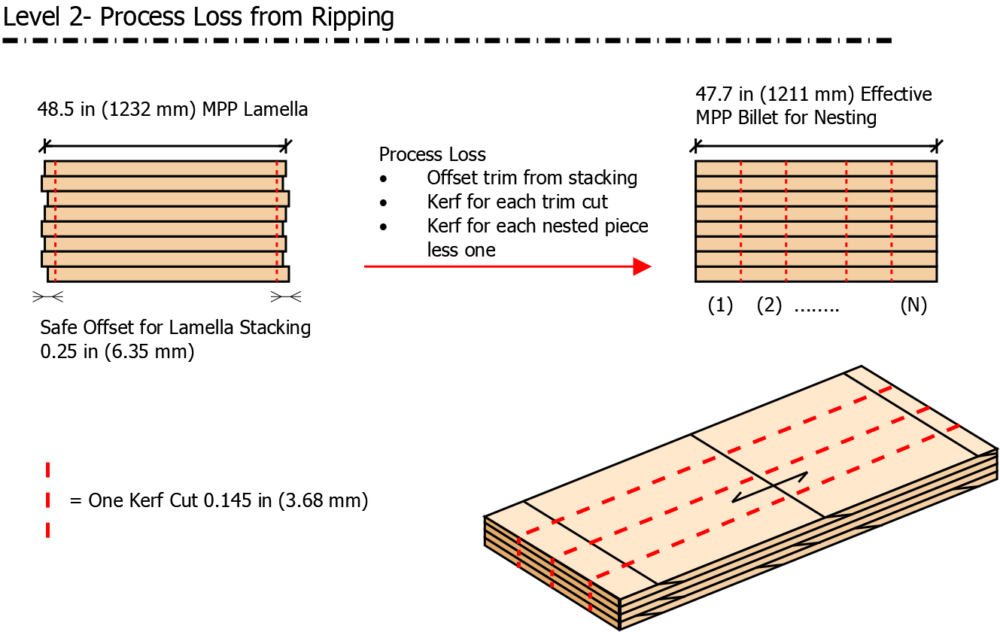
Figure 4: Mass Ply Billet Layup and Kerf Loss
A ¼ inch (6.4 mm) offset is used to trim the billet on each edge before cutting. The ¼ inch cut is also enough to keep the bandsaw blade tracking in the billet. The effective billet for nesting becomes about 47.7 inches (1211 mm) after adding in kerf and trim width.
Once ripped, properly nested beams are sent to the Precision End Trimmer (PET). The PET cuts MPL to length based on the desired dimensions. Figure 5 shows how a long MPL can be cut into many pieces from a single strip.
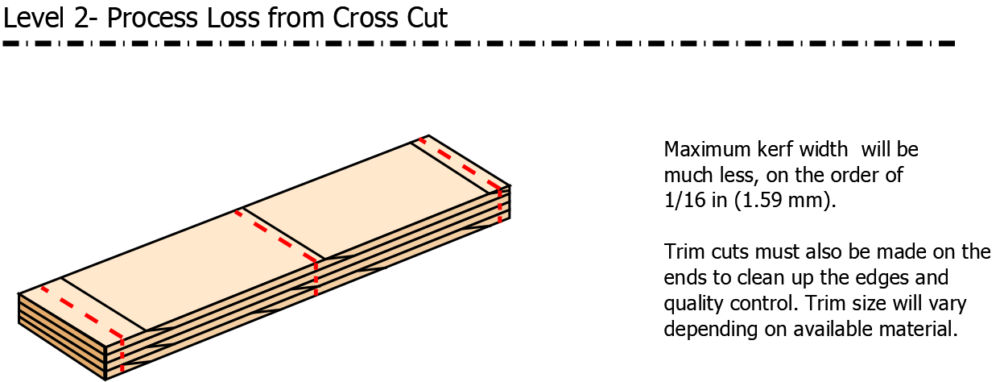
Figure 5: Cutting MPL to Length
With proper planning, beams and columns with like widths can be nested along their length to maximize billet use.
Applying these Ideas to a Job
The ideas behind nesting for the beam and column line look like a puzzle. The puzzle is easy when the pieces are all the same shape and size. Table 1 shows a series of different beams that can be nested inside a single Mass Ply billet.
Table 1: Efficiently Nested Beams/Columns
| Number of Beams | Economic Width (in) |
| 2 | 23.75 |
| 3 | 15.75 |
| 4 | 11.75 |
| 5 | 9.375 |
| 6 | 7.75 |
| 7 | 6.625 |
| 8 | 5.75 |
| 9 | 5.125 |
| 10 | 4.625 |
When the pieces are different shapes and sizes, the difficulty of efficiently nesting the pieces increases greatly. Projects using Mass Ply and MPL can include many pieces with different depths, thicknesses and lengths. Nesting many different shaped pieces requires a mix of panel sizes. The combination of juggling nesting with delivery order can pose quite the challenge.
We have many talented individuals at Freres who are familiar with balancing the demands of a modern job. Freres can guide you through the material quoting process. As always, we encourage customers to reach out to us early in the design process. Early collaboration with Freres can make project planning and material acquisition much smoother when construction is about to begin.
Subscribe
We’ll send you a notification when a new story has been posted. It’s the easiest way to stay in the know.